



How to Manage Your Body Temperature While Snowboarding at High-Altitude Mountain Resorts
Snowboarding at a high-altitude mountain resort is an exhilarating experience—but the combination of thin air, freezing temperatures, wind, intense sunlight and changing activity levels can make body-temperature management surprisingly difficult.
You may feel cold while riding the lift, overheat during a demanding run, and then become chilled again during a lunch break. At elevation, your body is also working harder to deliver oxygen to your muscles, which can increase fatigue and make it more difficult to recognize early signs of cold stress or altitude illness.
The solution is not simply wearing the warmest possible clothing. It is building a flexible system that helps you stay warm when inactive, release heat during intense activity and regulate your temperature throughout the day. This guide explains practical strategies for managing body temperature while snowboarding in high-altitude resorts, including how to layer clothing, use heated apparel, manage moisture, pace yourself and recognize warning signs.
Table of Contents
- Why High Altitude Makes Temperature Regulation More Difficult
- Build a Flexible Layering System
- Use Heated Clothing Strategically
- Protect Your Hands and Feet
- Regulate Temperature During the Snowboarding Day
- Manage Hydration, Nutrition and Altitude Adaptation
- Recognize Cold and Altitude Warning Signs
- High-Altitude Snowboarding Temperature Checklist
- Questions Fréquentes
- Chiffres Clés
Why High Altitude Makes Temperature Regulation More Difficult
High-altitude resorts expose snowboarders to several environmental challenges at once:
- Lower temperatures, especially early in the morning and after sunset
- Wind chill on exposed ridges and chairlifts
- Low humidity, which increases moisture loss through breathing and perspiration
- Reduced oxygen availability, which makes physical effort feel more demanding
- Strong ultraviolet radiation, even on cloudy days
- Rapid weather changes, particularly above the tree line
At approximately 3,050 metres, or 10,000 feet, the inspired partial pressure of oxygen is significantly lower than at sea level. The body needs time to adapt, and exercise performance can remain reduced even after acclimatization. citeturn0search1
"High-altitude environments combine cold, low humidity, increased ultraviolet radiation and reduced air pressure, creating additional health challenges for travelers" — CDC Yellow Book
This creates a common snowboarding problem: you can feel exhausted before you realize that you are becoming cold, dehydrated or overheated. A planned temperature-management strategy is therefore more reliable than reacting only when you feel uncomfortable.
Build a Flexible Layering System
The most effective approach to cold-weather comfort is a three-part layering system:
- A moisture-managing base layer
- An insulating mid-layer
- A weather-resistant outer layer
1. Start with a moisture-wicking base layer
Your base layer sits next to your skin and should move sweat away from your body. Choose a fitted top and bottom made from synthetic fibres or merino wool rather than cotton.
Cotton absorbs moisture and dries slowly. Once wet, it can increase heat loss during chairlift rides or rest periods. A technical base layer helps preserve a dry layer of warm air close to your skin.
Your base layer should be:
- Comfortable without restricting movement
- Lightweight enough to avoid bulk
- Breathable during high-output riding
- Long enough to prevent exposed skin around the waist and wrists
2. Add insulation according to your activity level
The mid-layer traps warm air and provides insulation. The right thickness depends on the forecast, wind and how aggressively you ride.
A practical combination may include:
- A lightweight fleece for active riding
- A synthetic insulated vest for additional core warmth
- A packable insulated jacket for lift rides and breaks
- A heated base layer or jacket for more controlled warmth
Avoid wearing so much insulation that you begin sweating heavily during the first run. Excess moisture can later make you feel colder when your activity level drops.
3. Use the outer layer to control wind and moisture
Your snowboard jacket and pants should protect against snow, wind and moisture while allowing excess heat to escape.
Look for:
- Waterproof or highly water-resistant fabric
- Ventilation zippers
- Adjustable cuffs and hems
- A powder skirt or snow-resistant waist design
- Enough room for layers without compressing them
A waterproof outer layer is particularly important because wet insulation loses effectiveness. Snowboard clothing guidance commonly recommends combining moisture-wicking layers with weather-resistant outerwear to remain comfortable as conditions change. citeturn0search4turn0search2
Use Heated Clothing Strategically
Heated clothing works best as part of a layering system—not as a replacement for insulation and weather protection.
The key advantage of heated apparel is that it gives you adjustable warmth when your body needs additional support, particularly during low-movement periods such as:
- Riding chairlifts
- Waiting in lift lines
- Watching friends or family on the slopes
- Taking breaks outdoors
- Snowboarding in windy or very cold conditions
- Riding during early-morning or late-afternoon temperatures
Choose the right heated garment
Different snowboarders benefit from different heated products:
| Snowboarding need | Useful heated apparel | Why it helps |
|---|---|---|
| Cold hands during lift rides | Heated gloves | Provides targeted warmth without excessive bulk |
| Persistent cold feet | Heated socks or insoles | Supports warmth inside snowboard boots |
| Whole-body comfort | Heated jacket or base layer | Adds adjustable warmth across the torso |
| Cold-sensitive riders | Heated gloves plus heated socks | Protects common problem areas simultaneously |
| Long resort days | Spare batteries | Helps extend usable heating time |
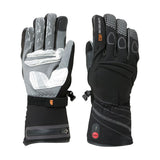
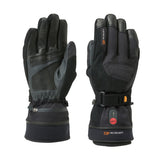
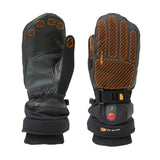
30seven heated clothing uses rechargeable battery-powered heating systems with adjustable settings in selected products. Its heated gloves are designed for cold-weather use, while the heated socks use removable heating elements and external batteries. Product specifications vary by model, so check the relevant product instructions before your trip. citeturn0search5
"30seven heated gloves include Novaheat technology, rechargeable batteries and three heat settings, with operating time depending on the selected temperature" — 30seven
Start on a low or moderate setting
A common mistake is switching heated clothing to maximum power before leaving the lodge. This may create excessive warmth during an active run and drain the battery faster.
Instead:
- Begin with a low or moderate setting.
- Increase warmth before a long chairlift ride.
- Reduce the setting during intense riding.
- Reactivate the heat during breaks or exposed sections.
- Keep a spare battery available for a full day outdoors.
The goal is to maintain comfort without sweating. Heated clothing is most effective when used proactively and adjusted frequently.
Protect Your Hands and Feet
Hands and feet often become cold first because they are exposed to wind, pressure and reduced movement. Snowboard boots and gloves can also restrict circulation if they are too tight.
Keep gloves warm and functional
Choose gloves or mittens that:
- Fit without compressing your fingers
- Leave enough space for a thin liner if needed
- Have waterproof and wind-resistant shells
- Extend over the jacket cuff
- Allow you to operate bindings and zippers safely
Heated gloves can be particularly useful for snowboarders who struggle with cold fingers. Some 30seven heated glove models are designed with warmth around the back of the hand, fingers and fingertips, helping target areas that commonly become uncomfortable in freezing conditions. citeturn0search5
Do not wait until your fingers are numb before activating the heating system. Early, moderate warmth is generally more comfortable than trying to recover from severely cold hands.
Keep snowboard boots comfortable, not overly tight
Tight boots can reduce circulation and make your feet feel colder. Avoid wearing multiple thick pairs of socks, which may create pressure points and limit air circulation.
A better approach is:
- Wear one technical snowboard sock
- Keep the sock dry
- Avoid folding or bunching fabric
- Confirm that the boot does not compress your toes
- Use heated socks or insoles only if they fit comfortably with your existing setup
30seven heated socks are designed with removable heating elements, external battery attachment and temperature control. Some models are also designed to be washed according to the manufacturer’s care instructions. citeturn0search5
Regulate Temperature During the Snowboarding Day
Temperature management is not only about clothing. Your behavior, timing and movement patterns have a major effect.
Use the chairlift as a temperature checkpoint
Chairlift rides are ideal moments to assess your body:
- Are your fingers becoming numb?
- Is sweat accumulating under your helmet or base layer?
- Are your toes losing sensation?
- Do you feel unusually tired or short of breath?
- Is your jacket vented appropriately?
Adjust your heated clothing or ventilation before starting the next run. Small changes are easier and safer than waiting until you are uncomfortable.
Open vents before overheating
Snowboarding can generate substantial body heat, especially during carving, powder riding or steep terrain. Open jacket vents, loosen a collar or reduce heated apparel during demanding runs.
Your objective is to avoid soaking your base layer. A damp base layer can become cold quickly when you stop moving.
Add warmth before breaks
Before stopping for lunch or spending time outdoors, add a layer or increase heated clothing gradually. Your body will cool quickly when movement stops, particularly in windy areas.
If possible, take regular indoor breaks to:
- Dry gloves and socks
- Refill fluids
- Eat a snack
- Recharge or change batteries
- Check for early signs of fatigue or altitude discomfort
Manage Hydration, Nutrition and Altitude Adaptation
Hydration is essential for both performance and temperature regulation. Cold air can reduce your perception of thirst, while dry mountain conditions increase water loss through breathing. Physical activity and altitude-related diuresis can add to the problem. citeturn0search1turn0search0
Carry water in an insulated or protected bottle and drink regularly rather than waiting until you feel thirsty. Limit alcohol during the first days at altitude, as it can worsen dehydration and interfere with rest.
Eat small, regular meals containing carbohydrates and protein. A compact snack such as an energy bar, dried fruit, sandwich or nuts can help maintain energy during long periods outdoors.
Acclimatization also matters. The CDC notes that the acute acclimatization process is especially important during the first three to five days after ascent. citeturn0search1
"The acute acclimatization process is especially important during the first 3–5 days after arriving at high altitude" — CDC Yellow Book
During your first day:
- Ride at a moderate pace
- Take longer breaks
- Avoid treating the first day as a maximum-effort session
- Pay attention to headaches, dizziness, nausea or unusual fatigue
- Tell your group if you feel unwell
Recognize Cold and Altitude Warning Signs
Temperature discomfort is normal. Certain symptoms, however, require immediate attention.
Possible cold-related warning signs
Look out for:
- Persistent numbness
- Pale, grey or waxy-looking skin
- Loss of coordination
- Uncontrolled shivering
- Confusion or unusual drowsiness
Move indoors, remove wet clothing, add dry insulation and seek medical help when symptoms are severe or do not improve.
Possible altitude-illness warning signs
Headache, dizziness, nausea, unusual tiredness and reduced coordination may indicate altitude illness rather than simply being “out of shape.” Symptoms can worsen if you continue ascending or exercising intensely.
Stop riding and inform a companion, ski patrol member or medical professional if symptoms develop. Severe confusion, difficulty walking, breathlessness at rest or worsening symptoms require urgent assistance.
"Altitude illness can develop before acclimatization is complete, and travelers should respond to symptoms by reducing exertion and seeking appropriate help" — CDC Yellow Book
High-Altitude Snowboarding Temperature Checklist
Before leaving your accommodation, check that you have:
- A moisture-wicking base layer
- A suitable insulating mid-layer
- Waterproof snowboard outerwear
- Technical snowboard socks
- Waterproof gloves or mittens
- Heated gloves, socks or a heated jacket if needed
- Fully charged batteries
- A spare battery for long days
- Water and high-energy snacks
- Sun protection for exposed skin
- A neck gaiter or face covering
- Dry replacement gloves or socks when possible
A simple strategy is to dress for the lift, vent for the run and reassess at every break. This keeps your clothing system responsive instead of static.
Questions Fréquentes (FAQ)
How many layers should I wear for high-altitude snowboarding?
Most snowboarders should begin with a moisture-wicking base layer, an insulating mid-layer and a waterproof outer layer. Adjust the thickness according to the forecast, wind, personal cold sensitivity and expected activity level. Heated apparel can provide additional warmth without requiring several bulky layers.
Are heated gloves useful for snowboarding?
Yes. Heated gloves can be useful for snowboarders whose fingers become cold during lift rides, windy conditions or long days outdoors. Use adjustable heat rather than maximum power continuously, and make sure the gloves fit comfortably without restricting movement or circulation.
Should I use heated socks inside snowboard boots?
Heated socks can help when your feet become cold easily, but fit is essential. Avoid excessive sock thickness or tight boots, as compression can make your feet feel colder. Always verify that the heated sock system is compatible with your boot setup.
How can I avoid overheating while snowboarding?
Use breathable base layers, open ventilation zippers during intense runs and reduce heated clothing to a low setting when moving vigorously. Add warmth before chairlift rides and breaks rather than wearing maximum insulation all day.
How does altitude affect snowboarding performance?
Reduced oxygen availability can make exercise feel more demanding and may increase fatigue, especially during the first days after arrival. Pace yourself, hydrate regularly, eat consistently and stop riding if you develop significant headache, dizziness, nausea, confusion or unusual shortness of breath.
Chiffres Clés
📊 Approximately 3,050 metres: At around 10,000 feet, inspired oxygen pressure is about 69% of sea-level values. (Source: CDC Yellow Book)
⏱️ 3–5 days: The acute acclimatization period is particularly important after arriving at high altitude. (Source: CDC Yellow Book)
🔋 Up to 8 hours: Certain 30seven heated sock models provide up to eight hours of battery life on the highest setting, depending on the product and conditions. (Source: 30seven)
🌡️ 3 heat settings: Selected 30seven heated glove models allow users to adjust warmth according to activity level and weather conditions. (Source: 30seven)
Conclusion
Managing your body temperature while snowboarding at a high-altitude mountain resort requires more than simply wearing a thick jacket. The most effective strategy combines moisture-wicking layers, breathable insulation, reliable weather protection, regular hydration, sensible pacing and frequent temperature checks.
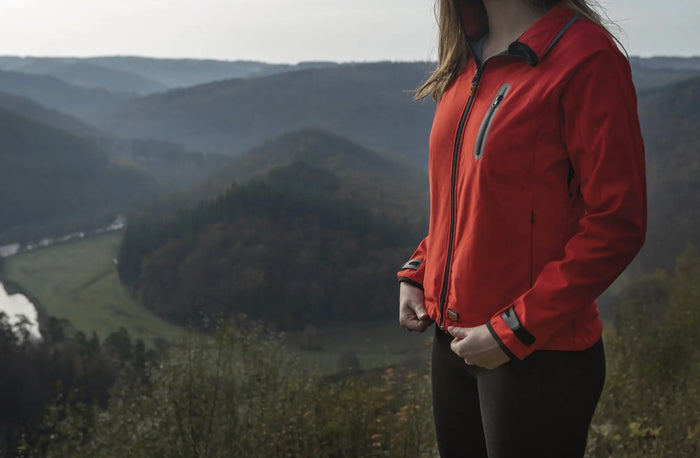
Use heated clothing strategically to add targeted warmth during chairlift rides, breaks and cold-weather exposure. 30seven heated gloves, socks and other heated apparel can help create a more flexible system for snowboarders who want to stay comfortable without sacrificing mobility.
Dress for changing conditions, adjust before discomfort becomes severe and respect the effects of altitude. With the right approach, you can spend more time enjoying the mountain and less time trying to recover from cold hands, wet layers or unnecessary fatigue.


